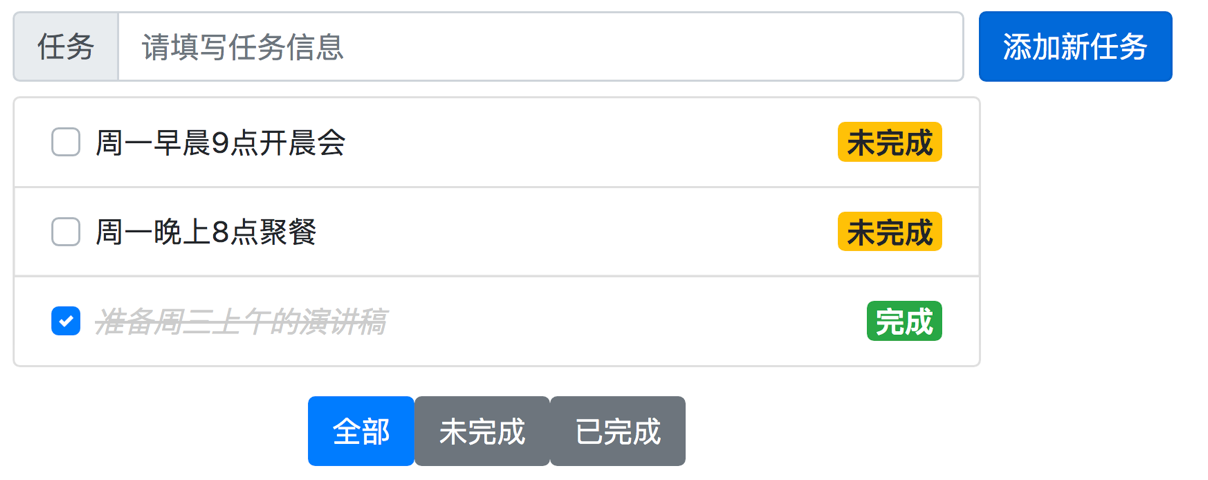
效果展示
创建项目
| npm init vite-app todolist
cd todolist
npm i
npm i less -D
|
将Boostrap相关文件复制到static/css文件夹下面
在index.css中设置全局样式:
1
2
3
4
5
6
7
8
9
10
11
| :root {
font-size: 12px;
}
body {
padding: 8px;
}
|
实现todo-list组件
- 初步实现components/todo-list.vue:
1
2
3
4
5
6
7
8
9
10
11
12
13
14
15
16
17
18
19
20
21
22
23
24
25
26
27
28
29
30
31
32
33
34
| <template>
<ul class="list-group">
<li class="list-group-item d-flex justify-content-between
align-items-center">
<div class="custom-control custom-checkbox">
<input type="checkbox" class="custom-control-input" />
<label class="custom-control-label" ></label>
</div>
<span class="badge badge-success badge-fill">已完成</span>
<span class="badge badge-warning badge-fill">未完成</span>
</li>
</ul>
</template>
<style lang="less" scoped>
.list-group {
width: 400px;
}
</style>
|
- 在App.vue中定义数据,并传入todo-list中:
1
2
3
4
5
6
7
8
9
10
11
12
13
14
15
16
17
18
19
20
21
22
23
24
25
26
27
28
29
30
31
32
33
34
35
36
37
38
39
40
41
42
43
44
45
46
47
48
49
50
51
52
53
54
55
56
57
58
59
60
61
| <template>
<div>
<todo-list :list="todolist"></todo-list>
</div>
</template>
<script>
import TodoList from './components/todolist.vue';
export default {
components: {
TodoList
},
data() {
return {
todolist: [
{
id: 1,
content: "周一早上8点开会"
},
{
id: 2,
content: "周一下午面试"
},
{
id: 3,
content: "周二下午发版本"
}
]
}
}
}
</script>
|
- 将传入的数据渲染到组件上面:
1
2
3
4
5
6
7
8
9
10
11
12
13
14
15
16
17
18
19
20
21
22
23
24
25
26
27
28
29
30
31
32
33
34
35
36
37
38
39
40
41
42
43
44
45
46
47
48
49
| <template>
<ul class="list-group">
<li class="list-group-item d-flex justify-content-between
align-items-center" v-for="item in list" :key="item.id">
<div class="custom-control custom-checkbox">
<input class="custom-control-input" type="checkbox" :id="item.id"
/>
<label class="custom-control-label" :for="item.id" >{{
item.content }}</label>
</div>
<span class="badge badge-success badge-fill"
v-if="!item.done">未完成</span>
<span class="badge badge-warning badge-fill" v-else>已完成</span>
</li>
</ul>
</template>
<script>
export default {
props: {
list: {
type: Array,
required: true,
default: []
}
}
}
</script>
|
- 点击勾选框之后切换完成状态
1
2
3
4
5
6
| ...
<input class="custom-control-input" type="checkbox" :id="item.id"
v-model="item.done" />
...
|
- 增加删除特效
1
2
3
4
5
6
7
8
9
10
11
12
13
14
15
16
17
18
19
20
| ...
<label class="custom-control-label" :for="item.id"
:class="item.done ? 'delete' : ''">{{ item.content }}</label>
...
<style>
.delete {
font-style: italic;
color: #ccc;
text-decoration: line-through;
}
</style>
|
- 实现todo-input.vue
1
2
3
4
5
6
7
8
9
10
11
12
13
14
15
16
17
18
19
20
21
22
| <template>
<form class="form-inline">
<div class="input-group mb-2 mr-sm-2">
<div class="input-group-prepend">
<div class="input-group-text">任务</div>
</div>
<input class="form-control" type="text"
placeholder="请填写任务信息" style="width: 350px;" />
</div>
<button class="btn btn-primary mb-2">添加新任务</button>
</form>
</template>
|
- 点击添加按钮将数据刷新到列表中
1
2
3
4
5
6
7
8
9
10
11
12
13
14
15
16
17
18
19
20
21
22
23
24
25
26
27
28
29
30
31
32
33
34
35
36
37
38
39
40
41
42
43
44
45
46
47
| <template>
<form class="form-inline" @submit.prevent="onFormSubmit">
<div class="input-group mb-2 mr-sm-2">
<div class="input-group-prepend">
<div class="input-group-text">任务</div>
</div>
<input class="form-control" type="text"
placeholder="请填写任务信息" style="width: 350px;"
v-model="taskContent"/>
</div>
<button class="btn btn-primary mb-2">添加新任务</button>
</form>
</template>
<script>
export default {
data() {
taskContent: ""
},
methods: {
onFormSubmit() {
this.$emit('addTask', this.taskContent);
}
}
}
</script>
|
- 在App.vue中添加新任务逻辑:
1
2
3
4
5
6
7
8
9
10
11
12
13
14
15
16
17
18
19
20
21
22
23
24
25
26
27
28
29
30
31
32
33
34
35
36
37
38
39
40
41
42
43
44
45
46
47
48
49
50
51
52
53
| <template>
...
<todo-input @addTask="addNewTask"></todo-input>
...
</template>
<script>
import TodoInput from './components/todu-input.vue';
export default {
data() {
list: [
...
]
},
components: {
TodoInput
},
methods: {
addNewTask(content) {
this.list.push({
id: this.list.length + 1,
task: content,
done: false
});
}
}
}
</script>
|
- 实现代码:
1
2
3
4
5
6
7
8
9
10
11
12
13
14
15
16
17
18
19
20
21
22
23
24
25
26
27
28
29
| <template>
<div class="btn-container mt-3">
<div class="button-group">
<button class="btn btn-primary">全部</button>
<button class="btn btn-secondary">未完成</button>
<button class="btn btn-secondary">已完成</button>
</div>
</div>
</template>
<style>
.btn-container {
width: 400px;
text-align: center;
}
</style>
|
- 点击按钮切换状态,并把状态暴露给App.vue:
1
2
3
4
5
6
7
8
9
10
11
12
13
14
15
16
17
18
19
20
21
22
23
24
25
26
27
28
29
30
31
32
33
34
35
36
37
38
39
40
41
42
43
44
45
46
47
48
49
50
51
52
53
54
55
56
57
58
59
60
61
62
63
64
65
66
67
68
69
70
71
72
73
74
75
76
77
78
79
80
81
82
83
84
| <template>
<div class="btn-container mt-3">
<div class="button-group">
<button class="btn" :class="active === index ? 'btn-primary' :
'btn-secondary'" v-for="(item, index) in buttonList"
:key="item.id" @click="buttonClick(index)">{{ item.name
}}</button>
</div>
</div>
</template>
<script>
export default {
data() {
buttonList: [
{
id: 1,
name: "全部"
},
{
id: 2,
name: "未完成"
},
{
id: 3,
name: "已完成"
}
]
},
props: {
active: {
type: Number,
required: true,
default: 0
}
},
methods: {
buttonClick(index) {
if (index === this.active) return;
this.active = index;
this.$emit("update:active", index);
}
}
}
</script>
|
- 在App.vue中存取active变量:
1
2
3
4
5
6
7
8
9
10
11
12
13
14
15
16
17
18
19
20
21
22
23
24
25
| <template>
...
<todo-button v-model:active="activeIndex"></todo-button>
...
</template>
<script>
import TodoButton from './components/todo-button.vue';
export default {
data() {
activeIndex: 0
}
}
</script>
|
- 通过计算属性展示对应的列表
1
2
3
4
5
6
7
8
9
10
11
12
13
14
15
16
17
18
19
20
21
22
23
24
25
26
27
28
29
30
31
32
33
34
35
36
37
38
39
40
41
42
43
44
45
46
47
48
49
| <template>
...
<todo-list :list="taskList"></todo-list>
...
</template>
<script>
export default {
data() {
activeIndex: 0,
list: []
},
computed: {
taskList() {
switch(this.activeIndex) {
case 0:
return this.list;
case 1:
return this.list.filter(item => !item.done);
case 2:
return this.list.filter(item => item.done);
}
}
}
}
</script>
|
参考:
Vue3.0-18.案例 -
案例效果及整体实现步骤
Vue3.0-19.案例 -
初始化项目
Vue3.0-20.案例 -
梳理项目结构
Vue3.0-21.案例 - 封装todo-list组件 -
创建并注册TodoList组件
Vue3.0-22.案例 - 封装todo-list组件 -
基于Bootstrap渲染的列表组件
Vue3.0-23.案例 - 封装todo-list组件 -
为TodoList声明props属性
Vue3.0-24.案例 - 封装todo-list组件 -
循环渲染TodoList组件的数据
Vue3.0-25.案例 - 封装todo-list组件 -
使用v-model双向绑定复选框状态
Vue3.0-26.案例 - 封装todo-list组件 -
为已完成的任务添加删除效果
Vue3.0-27.案例 - 封装todo-input组件 -
创建并注册TodoInput组件
Vue3.0-28.案例 - 封装todo-input组件 -
基于Bootstrap渲染组件
Vue3.0-29.案例 - 封装todo-input组件 -
通过自定义事件向外传递数据
Vue3.0-30.案例 - 封装todo-input组件 -
实现添加新任务的功能
Vue3.0-31.案例 - 封装todo-button组件 -
创建并注册TodoButton组件
Vue3.0-32.案例 - 封装todo-button组件 -
渲染TodoButton组件的结构
Vue3.0-33.案例 - 封装todo-button组件 -
通过props指定默认激活按钮
Vue3.0-34.案例 - 封装todo-button组件 -
通过v-model更新激活项的索引
Vue3.0-35.案例 - 封装todo-button组件 -
通过计算属性动态切换列表的数据